When printing on a black or dark background, you need to print either sold or halftoned underbase of white ink. This short article will

detail how to create screen print friendly underbases in any version of Corel. Note: this article was written in Corel 11.0 but these techniques work in version 7.0 or higher all the way to X5.
Note: Click on images on the right to view them larger.
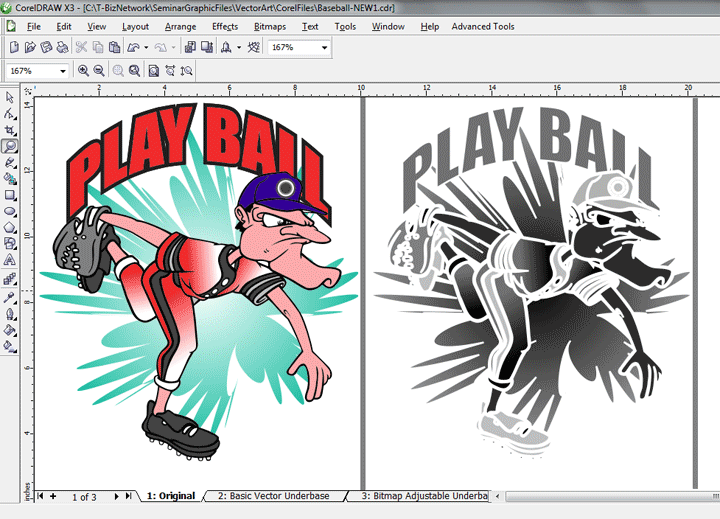
For spot color the ideal situation is to have the white underbase not be visible. If you just print the color on top of the same size underbase, you will see a little of the white “peek” out around the top color. This means making the underbase “skinnier” or slightly thinner. This is called a “choke.” See figure 1.
The idea of a choke is that the top color will “fall off” the edge of the white and you will only see the top color where there is an underbase. On a black shirt, if the top color is all purpose plastisol you won’t even see the portion that is off the underbase and on the shirt.
The amount of the choke is really based on how you print. If you are using low tension screens, wood frames, and vellum that might change shape a little, then a four or five point choke may be necessary. Note: there are 72 points per inch.
If you are using retensionable frames, tight mesh and laser acetate or film, then a one-half to one point choke may be all that you need.
Underbasing text that has no outline
Before showing how to underbase text, you need to first understand that when you place an outline around an object the outline is spread from the center out. This means that if you give an object a 2 point outline – you have really only increased the OUTSIDE edge of the image by ONE POINT. One point goes to the outside and one point covers the fill (making the fill “skinnier”).
To underbase text that does not have an outline, you need to first, make a duplicate of the object on a separate page or in a separate file. In Corel you can make a separate page and even name this page. To “duplicate” an image on a separate page, simply click on the object and then copy this object to the clipboard (Select object and then Edit/Copy).
Note: Clipboard is a temporary holding area in RAM for any image that you either Cut or Copy. Clipboard can generally only hold
one item at a time. When you copy or cut a new object, the one presently being held in memory is removed from Clipboard.
Next, make a second page. Right click on the Page 1 tab at the bottom of the page and select Insert Page After. You can even name this page UNDERBASE by right clicking on the Page 2 tab and selecting Rename Page. Paste the original image that you “copied” to the clipboard holding area by selecting your new Underbase page and then selecting Edit/Paste, or by right mouse clicking and selecting Paste. OK, you now have two pages with identical images on both pages.
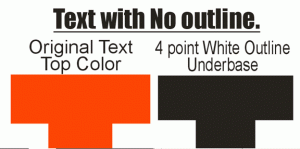
In order to make this appear more like the final film output you can change the fill color to black if you want. Next, simply give the image on the Underbase page a TWO POINT WHITE OUTLINE. Do this by making sure you have the Corel 8.0 Pantone Palette loaded and right click on the last color which is White. To verify that you have made it 2 points, select the Outline Tool from the Toolbar and then the Outline Dialog Box. Make sure the Size is 2 points. This white outline will make the visible black image on the page ONE POINT SKINNIER because as you remember, an outline goes to the outside and over the fill. The Status Bar will show that the object now has an outline. It will be hard to see the change but if you zoom in and take the outline off the image it will get slightly fatter (see figure 2). If you want a two point choke place a four point outline around the image.
When you print out the image, the second page will print as one of the separations. Just don’t print out the white plate.
Underbasing text that contains an outline
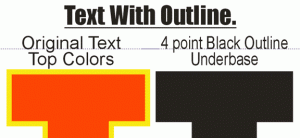
Everything is the same for text that has an outline (making new page and copying image to new page), except you will make the outline and the fill black and then give the image a THINNER black outline. If is has a four point outline now, give it a two point outline for a one point choke (see figure 3).
Underbasing a spot color Corel Trace image
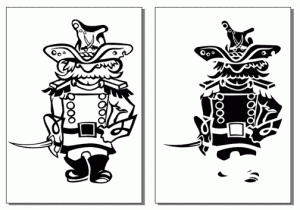
This is actually easier than your would think. If you scan an image and put it through Corel Trace, then you know that the image is now made up of a solid black background with white objects on top that have NO OUTLINE. This is important to understand.
BEFORE creating the underbase, first copy and paste (as outlined above) the image onto a new page. For ease you should copy the image before you add color to it. The new page will be the underbase (detailed next) and page one will be the original that you will color in.
If you click on the image on page two and then invert it (Effects/Transform/Invert) you will have a negative of the image. This is a

perfect underbase with no choke (figure 4).
To choke the image, simply select the inverted image and give the entire design a one or two point WHITE OUTLINE (figure 5). Remember, the amount of choking will be one-half of the outline you give the image.
IMPORTANT: FOR ALL OF THESE EXAMPLES WE WILL ASSUME YOU WILL NOT BE UNDERBASING BLACK INK.
Underbasing an image with color and gradations
If your image is already filled with color and there are gradations then you have other options. Again, copy the original image to a new page.
First, Group the image. If you have any text that you have placed an outline behind make sure to select that text and turn OFF
“Behind Fill” in the Outline Pen Tool dialog box.
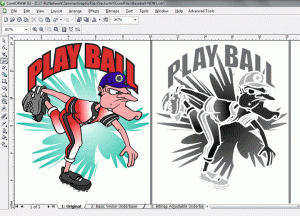
Select the entire group. Next, go to Effects/Transform and click on Invert. Then go to Effects/Adjust/Hue Saturation and set the Saturation to -100. You have basically made a negative of a colored file and you have removed the color and made it into a grayscale image. This is a respectable grayscale underbase but has no choke yet.
Finally, give all the objects a white outline by selecting the entire design and then right clicking on White in the color palette (remember most Corel palettes don’t have white so when in doubt load the Corel 8 Color Palette).
For a basic design you can choke the image 1 or 2 points. Remember, if you give the image a 4 point white outline it will be a 2 point choke. Figure 6.
Changing the amount of underbase on images with gradations
I said “respectable” because sometimes you need more white ink under certain colors. If this is going on a black shirt you may need more of an underbase.
First, convert the image to a bitmap by going to Bitmap/Convert to Bitmap. Set the resolution to 300dpi and leave Anti Aliasing
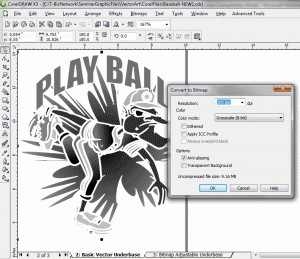
turned on. Figure 7.
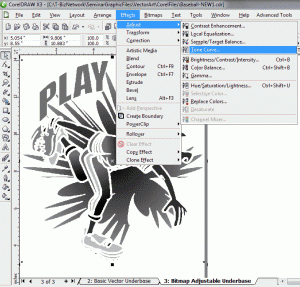
Next, you can darken the image a little more and even make it solid black if you want a solid underbase. Go to Effects/Adjust/Tone Curve. Frankly, this selection should be under Bitmap but Corel chose to put it here. Figure 8.
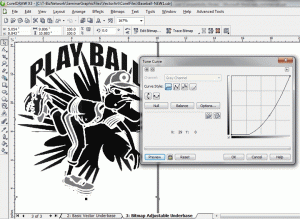
The Tone Curve lets you darken or lighten the image. Pull the curve down in the middle and click on Preview. You will see that you have darkened the lighter parts of the image. This will of course mean you print more white ink on the garment. If you want the image to be 100% black pull the curve all the way down. Figure 9.
Outputting Halftone Dots
If your image has solid spot colors with no gradations, then simply print out the separations as normal from Corel Draw. If you are using an inkjet printer, set it for the highest Photo quality so it will lay down more ink.
But, if your image has gradations you will need to output halftone dots. An inkjet printer does NOT print halftone dots without some sort of software RIP (raster image processor). An inkjet printer is a dumb printer that wants to print in color. A RIP is the “magic” that converts images with gray areas into dots and then sends the file to the
printer.
And, a RIP lets you determine the correct halftone frequency (number of halftone dots per inch – NOT the resolution of the file), and the correct halftone angle. For most average cartoon type work you can use a Frequency of 45 to 55 lpi (lines/halftone dots per inch). An angle of 25 degrees will almost always work – for all colors!
Check out T-RIP which is compatible with the Epson 1400 printer and Adobe Photoshop and Corel Draw (the Corel version to be released December 1, 2010).
Tips for printing underbased images
For spot-color underbases the white underbase should be put on an to 140 to 180 mesh (depending on how white the white in the image should be). Put the top colors on 200 to 305 mesh using all purpose ink. Obviously you will need to flash cure after the white. The halftone underbase can go on a higher mesh such as 180 to 230. If the white needs to be very bright, then it may be necessary to print the white, flash-cure it, print the white again, flash-cure it and then print the colors wet-on-wet.
Also, if you are new to screen making, it is important to try to hold the halftone dots on the screen. Use a dual-cure direct emulsion
with thin coats of emulsion – use the sharp edge of the scoop coater and coat the bottom side first and then the inside. Done. Make sure you expose for less time when using high mesh counts. Compare the film to the final washed out screen and see if you held all the small halftone dots. Plan to do a couple of test screens to get your exposure time down.
Good luck and have fun with underbases in Corel Draw.


