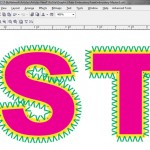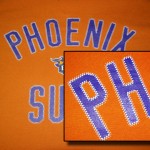
This one is fun. Have you ever looked at a shirt from a distance and thought it was an emblem or cloth appliqué stitched in place? I wrote about this topic at least ten years ago but was reminded that some things never change. I was in a local sporting goods store last week and saw a rack of Phoenix Suns basketball shirts for sale. Yes, I did think from a distance it was a cloth appliqué that had been stitched on. When I got close (you know how T-Shirt guys are), I was surprised to see if was a fake or faux stitch look. When I got home I dug through my old Suns shirts and there it was. Almost the same shirt – at least eight years old with the same look. See figure 1.
Click on images for enlarged view.
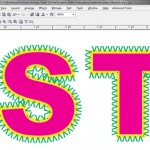
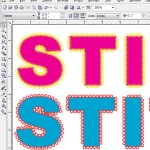
This effect can be done in a variety of programs including Corel Draw, Adobe Illustrator and even Adobe Photoshop. Basically you create a path and you either apply a shape (the letter “V”) or a custom brush along that path. See figure 2.
Here are the easy steps in Corel Draw.
1. Open Corel Draw (almost any version). Create the name. Keep the font bold and if necessary adjust the letter spacing if you don’t want the “stitch” to run into the neighboring letter. This is called kerning. If you don’t know how to do it click on Help in Corel.
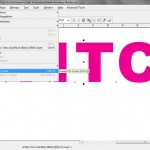
2. You can fill the text with a spot color but don’t give it a different color outline. In a typical image like this if you were actually going to stitch an appliqué (fabric stitched to fabric) there would probably NOT be an outline edge because the stitch becomes the edge.
3. Convert the image to curves/objects so it is no longer a font. Arrange/Convert to Curves. See figure 3.

4. Our goal is to use the “text along path” feature in Corel. But, if we do that then the letter “V” that we place along the outside edge of the text does not overlap the edge. It needs to overlap the edge if it is to be a fake stitch. See figure 4.
5. Give the lettering an 8-point outline (or however thick you need to make it work). Make this outline the same color as the fill. We want the fake stitch to overlap this outline. See figure 5.
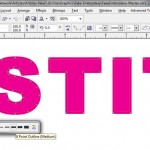
6. Select the Text Tool (“A”) and bring it over to the top of the object in the very center. If you hover just above the wording the tool turns to a “I” and you see the word edge. When you bring it inside the wording you see a small AB box. You do NOT want it inside the wording. You want to see the “I” and the word edge. See figure 6. When the word edge appears click the left mouse and you will now see a blinking vertical cursor. See figure 7.
7. Change the font to Arial (for now) and try a Size of 18 points. Again, this is a start. You will play with these settings as you get more comfortable with it.
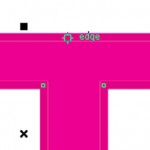
8. This is where the magic happens. Click on the blinking cursor and hold down the “V” key on the keyboard. For a bigger letter make it a capital V. While holding the V key down the letter V keeps repeating around the entire design. Sometimes corners and sharp bends look weird but don’t worry about it. See figure 8. Don’t worry that they don’t touch each other. When you print this they will.

9. That’s it! Keep in mind you now have a TWO color image with two different objects. The original wording is one object and you can now change the color and if you want – give the outline a new colors. The fake stitch effect is also a separate object and you can change this color, too. See figure 9.
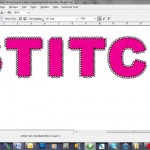
10. Let’s get creative. Rather than a “V” use an “O” or even the “/” front slash. Very nice! See figure 10.
11. If you are familiar with Corel and Illustrator and how they print out spot colors then you know you need to be in the Spot Color or a Pantone color palette so when you go to print these out you get the actual spot colors you want.
Screen Printing and Getting Creative
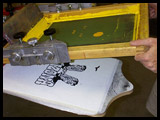
Printing these images on shirts is easy BUT you can now get more creative. You can simply print the job as a two or three color image using your average mesh for spot color. To keep it clean you might need to flash cure the bottom color before you print the “stitch” ontop.
To get creative, how about printing the stitch with puff ink! It will now have a thread feel on the shirt. Plan B is to simply use a very low mesh count for the stitch effect.
Take this one step farther. Print the stitch screen with puff ink. After the shirt comes out of the dryer, place a piece of foil on the image and hit it with light pressure on the heat press. Peel the foil and you now have a “silver thread” look. Wow!
Have fun with this simple effect.


