A Little DTG Direct-to-Garment Background
In 2004 when I first developed the T-Jet printer I was convinced it would be easy for the garment decorating industry to add this process to their bag of tricks. After all, other than the large Kornit printer (at that time), most machines were simply an Epson base inkjet paper printer that was torn apart and re-configured to print onto other materials.
The first machines sold in 2004 and 2005 were simply CMYK (and light CMYK colors) machines using special pigment based textile inks that were “dummied down” versions of inks used for roll-to-roll fabric printing. These inks had pigments that did not settle (too much) and could be left in the printer for a number of days or even weeks without any head clogging issues. Life was good selling machines like this. Users did little maintenance and everyone was happy.
In late 2005 I started to talk to DuPont about making white ink for the DTG (direct-to-garment) machines. Their first reaction was “we can’t do that.” But after much pushing on my part they developed a white ink that was based on titanium dioxide as the white pigment particle. This is the same and ONLY pigment used for white ink, white house paint, white coatings, etc. This is called TIO2 in the industry and it is a heavy pigment that is prone to settling.
And, the shirts had to be pretreated before printing the white and the pretreatment and white ink did not like being near each other – which is how it works to keep the white bright on a black background. If you got pretreatment in a head with white ink the white ink would clog in the head. Bad news.
When we introduced our first “white” machine in September of 2006, we thought we have found nirvana. Instead we found we compounded the machine problems by about 20 times. We were not prepared for the fact that most users thought they bought a “plug and play” machine and they had ZERO desire to do any type of increased maintenance. It was a nightmare. And, even today, printing with white ink continues to create problems for printers who do not want to take ownership of their investment.
I provide this background because now that I am no longer selling machines I still have former customers who seem to think DTG machines simply don’t work and there has been a lot of negative talk on industry forums about the downside to DTG machines. The truth is there are THOUSANDS of DTG machines printing shirts every day. The happy printers are busy printing and don’t spend time on industry forums. Yes, they have all learned “the secret” to making money with their machines and yes, it might have been a painful learning experience – BUT – once they figured it out AND took ownership of their investment – live was good.
What is “the secret?” MAINTENANCE, MAINTENANCE, MAINTENANCE
We were all guilty of selling DTG machines to anyone with money. That was probably wrong. These machines LIKE TO PRINT. That means if you are a casual part-time printer the machine might set for a few days. Your CMYK colors should be fine. Your white ink will not be. The TIO2 pigment will settle in the lines, clog the heads and make life miserable for you.
Large companies like Zazzle, Café Press, Spreadshirt and others run these exact machines. They found out the hard way that if you don’t keep a DTG machine clean and try to keep the ink flowing you will have problems.
Before you decide NOT to buy a DTG machine because you just don’t want the hassle, think again. A DTG printer will print a beautiful full color print on light and dark shirts in just a few minutes. OK, if you are a screen printer a few minutes is like a lifetime. But, if you are doing short runs with no setups, no color separations, no tear down and you are getting more than wholesale for a shirt – you will love this process.
But, you will have to take ownership of your investment. It is NOT plug and play. It likes TLC (tender loving care) and to be pampered a little. If you don’t want to accept the small responsibility of cleaning your machine before and at the end of the day – or don’t want to take the proper steps to keep the ink moving every day (even with a simple head cleaning or two), then don’t buy a DTG machine. Everyone will be happier.
Five Minutes Per Day Is All I Ask
Maintenance on a DTG machine is not hard – it just takes a little time every day. Here are the things you should do EVERY DAY (at least when you are using the machine).
When you First Turn the Machine On
This one is easy. When you turn the machine on in the morning you should do two or three head cleaning cycles. This gets the ink moving and helps open up heads that might be partially clogged.
The rest of these items should be done at the end of the day.
Clean the Capping Station
This is the biggie. The capping station is that magic little “tray” that comes up against the bottom of the head assembly and caps it or seals it so the head won’t clog. And, it caps the head from outside air when you are doing a head cleaning. (Click on illustrations on right to enlarge them.)
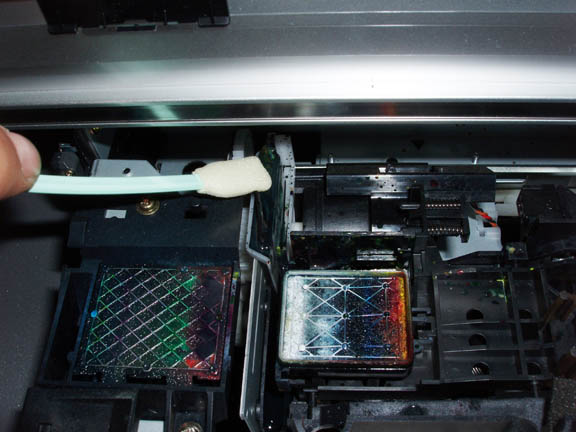
The problem is the capping station can get ink chunks (especially the white) over a period of time. After all, when the machine does a head cleaning cycle the capping station caps the head and a vacuum draws ink out of the head and dumps it into the waste tank. There is a chance excess ink sitting on top of the foam that lines the capping station will start to build up and dry.
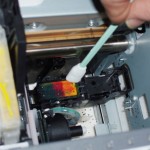
Guess what? If the capping station won’t cap tightly at night – what do you think will happen? The head will clog. If the clog is white ink, there may be ZERO way to salvage the $400 to $500 head. A lesson well learned. But, you will first call your supplier and blame them for selling you a faulty machine. They will say “did you read the manual about keeping the capping station clean?” and you will say – I never read a manual. Get my point?
I do sound a little cynical but after paying my techs to repair thousands of machines and having at least that many come from customers who swore they kept the capping stations clean – I offer Figure 1 which is a very gunky capping station that was “clean” by a customer’s standards. I rest my case. Figure 2 shows the simple steps in cleaning it. A “foam tipped swap” works well (available from most drug stores, medical suppliers, or your DTG supplier). Simply soak it in head cleaning fluid, window cleaner or even water (yes).
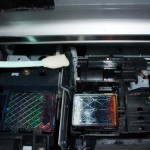
Keep the Capping Station Moist at Night
This is also a biggie. Since the capping station typically has a foam liner in the bed of it, there is a chance this foam will get crusty and full of ink. This ink can start to dry out. By simply putting a few drops of head cleaning fluid (or glass cleaner) on the capping station at night, you will keep the head “moist” and help prevent it from drying out.
Clean the Wiper Blade
All Epson based printers have a small wiper blade (it looks like a tiny windshield wiper). This blade is used to wipe the bottom of the head. As you print high speed and literally dump ink on a T-Shirt the bottom of the head can start to get ink build up. The wiper wipes the head. The problem is if you are printing with white ink, the wiper can start to get a buildup of white ink that will dry causing the wiper to not be effective. You must clean the wiper blade every day! Clean the wiper the same way as the capping station. Figure 3.
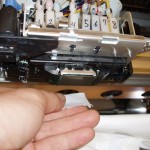
Clean the Bottom of the Print Head
When you are printing with the head very low and close to the shirt (for the best quality) the head will start to pick up lint off the shirt. And, ink can simply start to build up from the amount of ink being pumped through it. The Wiper Blade is suppose to clean off the bottom of the head but as you know, some of these parts on Epson based printers are like a toy. They only work pretty good. And, ink will start to get around the edge of the head. Using your foam tipped swab, wipe down the bottom of the head and around the edges. Be careful not to scratch the bottom of the head. Figure 4.
Check Your Ink Levels
One of the problems with an “open ink system” is that there is a close relationship between the height of the ink bottles and the bottom of the head. If the bottles are too high, ink will siphon out of the head (you might wake up to find all the ink on the machine and the floor). If the ink bottles are too low, you will have ink starvation. On machines that use cartridges you have little control over the height of the ink. If you are using a bulk ink system or open cartridges, do NOT overfill the cartridges or bottles. The manufacturer will generally put an “ink level” mark on the bottle or cartrige. That might not always be correct. You are much better off not topping off the bottles or cartridges and keeping the ink level in them more of a constant and refill them more often. Figure 5.
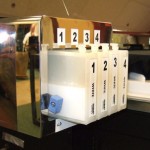
Check the Spit Tray
On the side of the machine that is away from the capping station is what is called a Spit Tray. If you watch the printer print you will see it stop every now and then and “spit” ink into this tray. This is like clearing its throat. It keeps the ink flowing. The spit tray can start to build up ink and sometimes during the spit, the head actually picks up ink. Keep the spit tray clean and not overflowing with ink.
Don’t Neglect a Nozzle Check Every Day
This one really hits home for me. I stopped counting how many times someone called to complain about a poor print and when asked “did you do a nozzle check?” the response was no. A nozzle check tells you how the nozzles are firing. It is like a “report card.” If all the nozzles are firing and the print is weak, then something else is going on. If only 50% of the nozzles are firing then it is OBVIOUS why the print is weak and the reason you only have 50% nozzles is probably a clogged capping station, crusty wiper blade or the machine has been setting for a week without use. It tells a whole lot.
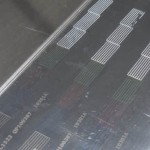
In order to see the white ink on a nozzle check, use clear film or something transparent. You can’t clearly see how well the white ink is printing on white paper. Figure 6.
Should You Shut The Machine Down at Night?
Some manufacturers say to NOT shut the machine down. Others claim that the head caps better during shut down. This is true.
BUT, most software to drive these machines now has a “wakeup” feature. Since these machines like to run, you can set the software to do a head cleaning during the night to keep the ink flowing. If you set a machine to do a head cleaning two times per night, you will probably use about $4.00 USD of ink. No big deal if it saves a head!
If you don’t have a head cleaning “wakeup” utility then shut the machine down at night.
Shake the White Ink
The CMYK colors are much more stable than the white ink. The TIO2 will settle over night. Some brands of white ink have “hard settling” where the ink turns to small chunks. This is not good. If you shake the ink a little you shake the chunks back into it. Head clogs! Other newer brands have a better way of trapping the TIO2 pigment and the settling is “soft settling.” This means you can give the ink a shake and the thicker ink in the bottom of the bottle mixes back ink.
You should get in the habit of gently rotating and agitating the white ink bottles each morning before you print AND every night before you go home. Don’t shake the bottles so hard that you get air bubbles in the ink. Just rotate and agitate a little. Gentle.
How much time does the above daily maintenance take? My guess… five minutes.
Weekly Maintenance
If you print a lot you will undoubtedly start to get lint from shirts on key parts. All Epson based printers have drive belts, encoder strips and other moving parts that can get lint and ink stuck to them.
Clean the Encoder Strip
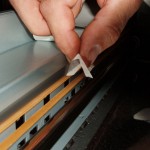
A lot of people suggest cleaning this daily and if you print 24/7 then that is OK. For most printers, this can be cleaned once a week.
The Encoder Strip is that little strip of plastic that goes across the back of the machine. If you look closely at it you will see small little marks on it. This is the “brains” to the printer. The head had a sensor that reads the tick marks on this strip and from that determines where “home” is.
If you start to get images in weird locations and images that don’t even belong to yours in various parts of the shirt, chances are the
Encoder Strip has ink or lint on it. You have just confused “the brain.”
Clean the Encoder Strip very carefully. You can remove it from the machine (remember which way it goes!), but you can actually clean it on the machine. Use a foam tipped swab or better yet a small pre-packaged pad soaked with Isopropyl Alcohol. Figure 7.
OK, if you own a standard inkjet printer, you are saying you NEVER have to clean any of these items. When printing on T-Shirts the software driver is designed to literally open the flood gates and lay down 50 times more ink than for paper. This means you are creating a miniature “rain storm” inside your printer and this excess ink gets on everything.
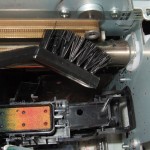
Clean the Print Carriage Drive Belt Gear
There is a drive belt that moves the print carriage on all Epson based printers. Use a small toothbrush (or foam swab), and clean any lint from the belt gear. Figure 8.
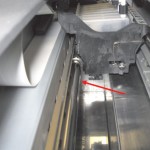
Lubricate the Carriage
The head moves on a smooth rod and after time the rod can get dry and pick up lint. You should wipe the rod down every week and then apply a light lubricant to it. You can use a standard “appliance/sewing machine” oil and put a few drops on the rod. Figure 9.
Check the Waste Tank Level
The Waste Tank is where money gets flushed down the drain. It is where all the ink goes from head cleanings. If the tank gets too full it will overflow. But, worse yet, the hose that goes from the capping station to the waste tank can get clogged. If this happens the capping station will overflow when you do head cleanings.
Also, many machines have an on/off valve going to the waste tank. There is a good chance when you use cleaning fluid on the capping station at night that it might draw ink from the head and start a siphon that goes right into the waste tank – and then on the floor. By closing a valve to the waste tank at night you prevent this. Just remember to open it in the morning!
Environmental and Location Concerns that Effect Print Quality
All DTG machines don’t like dry conditions. The ink in the head is more prone to clog if the air is dry. If you are in a dry area with low humidity, OR, if you plan to put the machine in a room with very dry heat in the winter, consider using a humidifier. The ideal conditions are: 50 to 65% relative humidity, dust free, with no airflow over printer. Room temperature 68 to 85°F (20 to 29°C).
If you are a screener a DTG machine will not like to be in a hot shop full of lint.
If you are limited on space, try to find a way to NOT pretreat dark shirts near the machine. The mist of the pretreatment may bet around the head and clog it.
Other Items Affecting Print Quality
Other than the daily maintenance, there are other things you can do to help print quality and reduce maintenance.
Preheat Shirts
Some shirts give off a lot of lint. If you simply place the shirt in a heat transfer press for a few seconds you matt down the fibers and you will have less lint, less fibers getting on the bottom of the print head, and much less problem with lint.
Keep the Shirt Holders Level
All DTG machines have the problem of quality vs making money for the manufacturer. The Shirt Holders are generally made of sheet metal which is not always flat. Make sure the board/holder is flat and if this means bending it, shimming, it or doing whatever it takes, then do it. You will have less head strikes and overall better prints.
Summary
You can see that I have developed a slight “attitude” about DTG machine owners not taking true ownership of their expensive investment. By following some simple rules and taking five minutes per day you will have a happy machine, happy customers, good looking prints, replace less heads, and in general have a great experience and love your machine!


