Combining Images from Corel Draw with Adobe Photoshop
There are many times you want to combine a piece of artwork from Corel Draw with something in Adobe Photoshop. Traditional artists are trained to take the Photoshop (photorealistic) portion of the artwork into Corel to ad vector elements. That is all well and good but with all the automated color separation programs on the market it is often easier to separate in Photoshop.
Note: Click on each image to make it larger.
Yes…. I know….. you can do trapping and choking easier in Corel. But, for a lot of T-Shirt images that combine hard edges, type effects and photographs, it is sometimes easier to just output separations from Photoshop and not worry about trapping and choking.
Figure 2
The truth is when you see a really hot photorealistic image on a shirt with a combination of shading, text and photo images – chances are it was done on high mesh count screens (230 and 305) with good tension, printed on a tight printing press and no trapping was done.
That said, let’s see the easiest way to take images from Corel to Photoshop. As we all know, these two programs don’t really talk to each other. Unlike Adobe Illustrator files that can be opened in Photoshop (rasterized), Photoshop turns up it’s nose at a Corel file.
The important point to remember is that we really want to the Corel portion of the file to end up with no background in Photoshop. In order to add additional elements to it in Photoshop we want a transparent background. The steps are easy.
- Create the image in Corel. Simple.
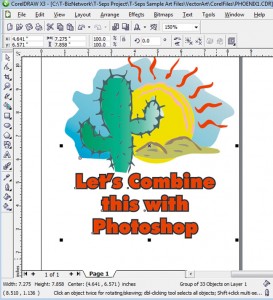
- Group the entire image. See figure 1.
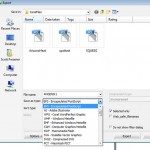
- Export the image from Corel as an EPS. Go to File/Export. Drop down the Options window and check Selected Only. You can also do a Save As a PDF. EPS and PDF formats retain the vector qualities and if there is no background color the images will come into Photoshop with a Transparent Background. See figure 2.
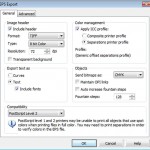
- Don’t worry about the EPS Export window. Just say OK to it. See figure 3. Since we are not going to be opening this in another vector program we really don’t care about most of this.
- Don’t forget where you exported or saveed it to. Corel is known to NOT export or save to a directory/folder that the file came from. It is easy to lose things in Corel.
- Open Photoshop. Go to File/Open. Find your file and click on Open. The next step is VERY IMPORTANT. Photoshop defaults to 72dpi for a vector to raster conversion. This means if you blow by the next screen (see figure 4) you will take you clean and
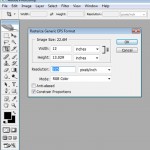
Figure 4 sharp vector file and make it low resolution. If this job is for T-Shirt printing, make sure you change the physical size to what you want AND that you make the resolution around 300 dpi. Uncheck Anti-Aliased (you don’t want Photoshop to soften the edges). Make sure the file is set to RGB. See figure 4.
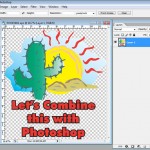
- When the file is rasterized make sure to open the Layers Palette (Window/Layers). This is where you build images using various components. Your file should look like it did in Corel but it should have a checkered background. That’s the good news. Checked backgrounds mean the file has NO background or has a transparent background. See figure 5.
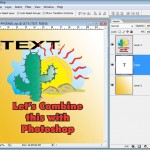
- What is the point? Well…. the point is that you can now add other elements to this file and place them behind the file and your file will act just like it did in Corel. There will be no white background. Perfect! See figure 6.
Have fun with combining Corel and Photoshop images.
