
If you are having problems loading the new “fixed” T-Seps 3.5.5 build 2.0 use the following steps as a temporary workaround.
If for some reason the T-Seps Separation Suite is NOT showing up in the Extensions panel after upgrading to build 2.0 then check to see if the folder com.tbiznetwork.tseps35.ccxxxx has been installed in the correct location shown below.
Mac: MacHD:/Library/Application Support/Adobe/CEPServiceManager4/extensions/com.tbiznetwork.tseps35.ccxxxx
We have found that some versions of Photoshop/Mac are missing the “extensions” folder in the path shown above. If that folder is missing then T-Seps won’t copy there the folder com.tbiznetwork.tseps35.ccxx there. Check the following path and in the CEP folder if you don’t see an extensions folder – make one and run the installer again. If a reinstall does NOT put the folder com.tbiznetwork.tseps35.ccxxxx in the extensions folder you can find the T-Seps extension folder at Applications/TSEPS35/Actions. You can copy the entire folder com.tbiznetwork35.tseps.ccxxxx to the newly made extensions fold shown below and then restart Photoshop.
Mac: MacHD:/Library/Application Support/Adobe/CEPServiceManager4/CEP/extensions/com.tbiznetwork.tseps35.ccxxxx
PC: C:/ProgramFiles (x86)/Common Files/Adobe/CEP/Extensions/com.tbiznetwork.tseps35.ccxxxx.
Make sure Photoshop is shut down/quit before installing any version of T-Seps.
If the Extension folder listed above is in the correct location and if you still don’t see T-Seps Separation Suite in the Extensions drop down then you can revert back to build 1.50 and use the temporary fixes as a workaround.
These fixes are designed to work with the “old” T-Seps plugin that is prior to July 31, 2019. If you downloaded the newer version (build 2.0) and had problems then you will need to download the older version from these links and install them and then try the various fixes below.
Mac T-Seps 3.5.5 build 1.50 (older version) DOWNLOAD HERE.
Windows T-Seps 3.5.5 build 1.50 (older version) DOWNLOAD HERE.
Temporary way to run T-Seps
As you know, T-Seps runs from scripts that are in the Actions Panel (Window/Actions). You would not normally run T-Seps from here but you can. The Action buttons are coded but it does not take much to figure out what they mean. As an example, SP92 is Simulated Process 9 Color plus 2 Whites. Easy. If you need to run T-Seps and don’t want to delve under the hood as outlined below then try this. Make sure the Actions are in Button Mode (in color). If they are not, go to the upper right drop down in the Actions panel and click on Button Mode.
Note: There are some routines like the convert to Halftones that are had coded in the Extension panel and do not run from the Actions panel.

Possible quick fix:
On either platform there can be a quick fix that seems to work on some systems. On either a Mac or PC in Photoshop go to the Preferences Menu (Mac – Photoshop/Preferences PC-Edit/Preferences).
Go to the Plug-ins tab. Check Enable Generator. Say OK and restart Photoshop. Preferences changes don’t work until you close and restart Photoshop.
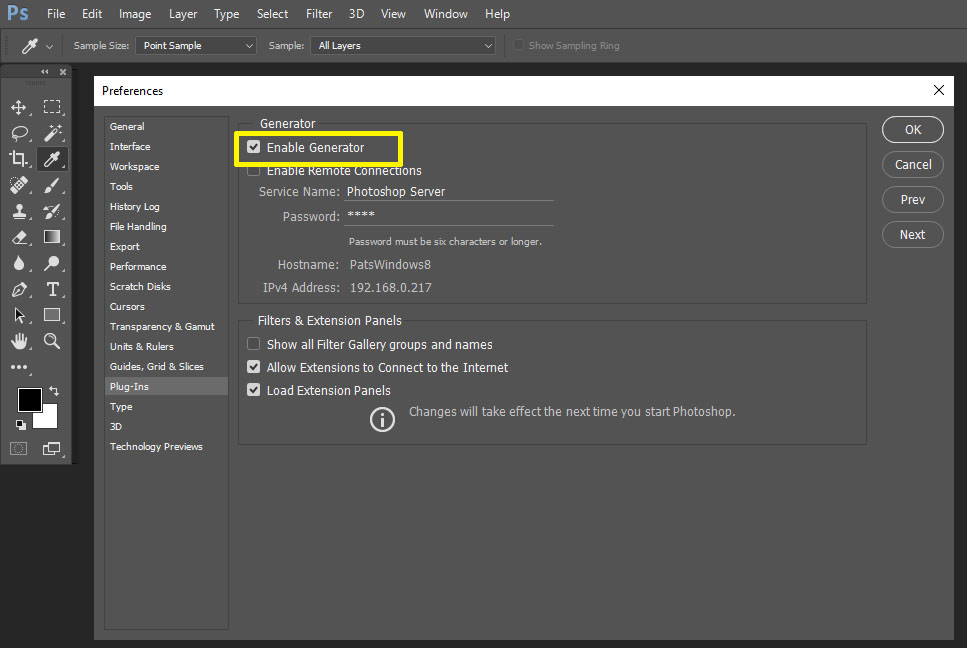
Try to load the T-Seps Separation Suite Extension. If not then skip to the Windows or Mac detailed fixed below.
Windows Fix
Here are the steps to temporarily fix this problem in Windows until we can either get Adobe to fix this or we come out with a version of T-Seps with a workaround built in.
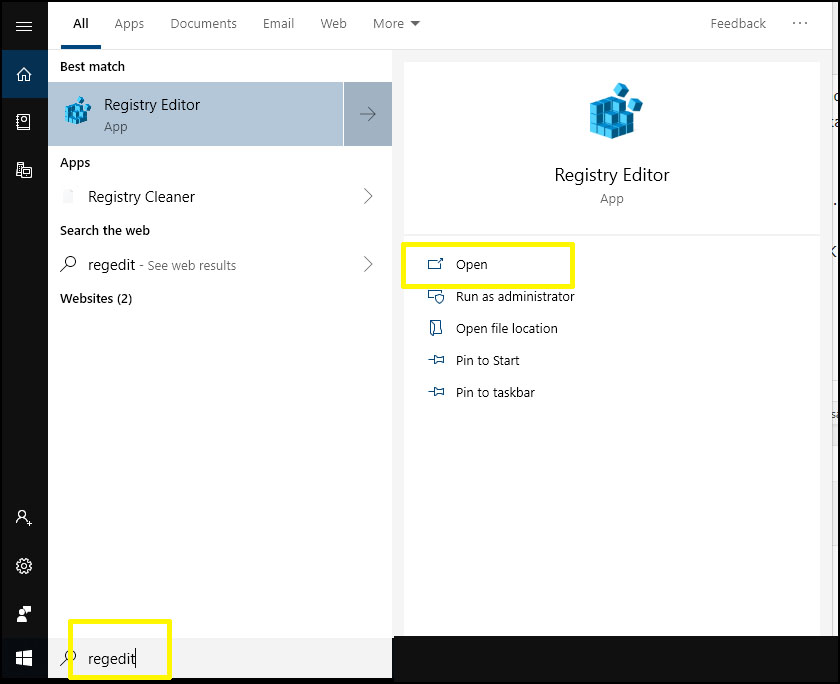
- Go to your Start button (lower left) and in the Search window type in RegEdit.
2. You may be asked if you “want to this app to make changes to your device.” Say OK to this window.
3. In the Registry Edit window select HKEY_CURRENT_USER and then Software and then Adobe.

4. In the Adobe drop down – find the section that lists CSXS files. You may have a number of these depending on how many versions of Photoshop you have installed. Start by making a change to the LAST one in list which should be the most current version of Photoshop you are using. (Your Adobe folder will show many more other files than in this “screen grab” here which has been edited to keep the size smaller.)

5. Select the last CSXS.# folder. In the right window you should see two files. One is (Default) and one is LogLevel. You need to add a new String Value to this list. Right click in the blank area below these two files and you will get a NEW window dropdown list. Select String Value.

6. The Default label for this new file is NewValue#1. You need to change this name. In the window that says NewValue#1 – type EXACTLY PlayerDebugMode (this is case sensitive).


7. Double-click on PlayerDebugMode. The new window will have a place for a Value. Enter the number 1 and click on OK.

8. Photoshop can be open when you do this. Try to open the T-Seps Separation Suite to see if the Extension Panel will load.
MAC Fix
The Mac fix is similar to Windows.
- Mac OS X comes stocked with an application named Terminal. The Terminal application is where you enter commands in the command line. It’s located in the Utilities folder within the Applications folder on your hard drive — choose Applications→Utilities (from the keyboard, press Shift+Command+U).
2. In Terminal type:
defaults write com.adobe.CSXS.8 PlayerDebugMode 1
Press Return.
Type: exit
Then press Return.
IMPORTANT: The number after CSXS is based on your Photoshop version. The number “8” is for CC 2018. The number “9” would be for 2019 and downward the number “5” would be for 2015. Use the appropriate number when you type based on your version of Photoshop.
3. Photoshop can be open when you do this. Try to open the T-Seps Separation Suite to see if the Extension Panel will load.
Done! You have just told Adobe to ignore security issues with an “extension panel” plug-in and to assume it is secure and signed. Yes, this can open a vulnerability to a plug-in or extension panel being installed that is not signed and not secure. This is a workaround for now.
If you have any problems doing this we can help. Email scott@tbiznetwork.com if you need assistance.

