Every few years companies like Adobe, Corel and others feel the urge to bring out new versions of their software – whether you want it or not.
They also like to move things around, remove tools you love, change the name of tools and otherwise create a small learning curve to get accustomed to the new version.
It was Adobe’s turn last a few years ago. In May of 2013 they rolled out Photoshop CS6 to much fanfare. And this morphed into CC with the introduction of the Creative Cloud. Yes, there are new features – which I will quickly list later – but what is much different about CS6/CC is how you buy/license it. Rather than detail each and every new feature (there are dozens and dozens) in this article I would like to give you the highlights of what features (or lack of) you will love or miss. And, I would like to give you my opinion on the new Creative Cloud method of delivering the software.
Click on images on the right to enlarge them.
Let’s Look At Creative Cloud First
There seems to be a lot of opinions on this one – almost like political parties. Adobe has a licensing option called Creative Cloud at www.CreativeCloud.com. For a low monthly fee of $49.99 per month you can download and use pretty much ALL of their programs. In fact if you have a licensed version of CS3 you can get a first year special offer of only $29.99 per month. These are on a one year contract. If you just want to try this service on a month-to-month it is only $75 per month and you can subscribe to just one program for only $19.99 per month. Such a deal!
On the surface it might appear that it would cost you more to do it this way if all you want to do is upgrade Photoshop which typically costs about $250 per year to upgrade. But look further. If you use Adobe Photoshop, Adobe Illustrator or any other programs, then I think this is a great deal. Why? Not only do you get all their programs BUT you can put them on two computers. Adobe calls the second version install a “backup” installation and it is very legal. And these computers can be Mac or PC. If you end up wanting to move one copy to a newer computer you simply deactivate one of the versions.
I love this feature. Since I develop software for both platforms, I have a Mac and PC. No longer do I have to upgrade both platforms. I also use Adobe Acrobat PRO for my manuals and I use Adobe Dreamweaver for some of my web development. And, I use In-Design for a lot of my printed matter. That means for $49.99 per month I can get ALL of these programs and put them on two computers! That is a HUGE savings.
In fact, I often talk to customers who are changing platforms (Mac to PC or PC to Mac) to accommodate their artists or often the type of RIP they are using for halftone output. They lament that they have to buy new software.
What if you are new to the world of Adobe products and have been dying to find a way to get the programs cheaper – or even on a payment plan. Here it is! You can see that I highly recommend considering the Creative Cloud if you want to use more than one of their products or if you are just starting out.
How does it work? You have to register with Adobe and get and Adobe ID. No big deal. You go to www.CreativeCloud.com and log in. Once you pay you have access to what is called Adobe Download Manager. It lists all the programs available and you simply click on Install for the ones you want. Just make sure you have a lot of free memory on the hard disk. These babies are big. It could not be easier. Adobe sends you upgrade notices and your computer needs to be online to authorize this install.
Photoshop CS6/CC Overview
Adobe did make major improvements to CS6 and CC (they started with CC and now have CC 2014, CC 2015 and CC 2017). My only problem is that for some of you who only really use Photoshop to do color separations – you won’t see many changes. For those of you who design and create on Photoshop will like some of the changes. Without going into detail about each new feature I will do a quick listing here of the key changes. To find out more simply type in a web search of “changes to Adobe CS6 and CC” and you will find lots of sites with videos and details.
The Missing Screen Button 
But first, let’s talk about what is NOT in CS6 and CC versions – the missing “Screen” button. For a LOT of screeners this is the only reason they have not upgraded to CS6. Starting with CS5, Adobe removed the Screen button from the Print menu. This button allowed you to set the halftone LPI/frequency, angle and dot shape for Channel Separations. This is huge. It was easy to make your settings and print to a RIP for halftones.
To paraphrase Adobe’s official response “Postscript has changed and there are problems with RIPs, blah, blah, blah.“ Wow. They never asked me if there were problems – there are not – and I have sold about 9,000 RIPs in this industry. Regardless of all the negative and nasty posts on Adobe support forums from screeners showing their dismay, Adobe says – “No way…. You screeners are out of luck.” OK, time to get over it. Our little industry doesn’t matter to Adobe and that’s that.
Moving on. What this means is that if you have a RIP for film output you will now have to go into the RIP and make changes. That is one more step because for most of us we use different halftone frequencies depending on the complexity of the job. I might use 55lpi or even 65lpi for high-end work but for simply cartoon stuff I could go down to 45lpi. When the Screen button was available it was a quick change. Now I have to go into T-RIP and make the changes before I send a job. And, if you send jobs to clients to print out – like I do, you want those settings as part of the file.
I do have a small inexpensive program I wrote called the Halftone Converter. Yes, it might seem like a blatant plug but I wrote this for myself to use and decided to sell it to make life easier for those with CS5, CS6 and CC.
What’s New in CS6 and the CC versions
New Look To Interface
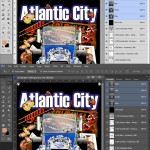
The first thing you will notice is the new default dark color scheme. This can be a little off putting at first. We are all very use to the light gray color scheme and with the new darker look it can feel like you are hunting around in a cave for the tools. Many of you will like the new cool look. I for one, have taken the liberty of changing back to the lighter colors – available as an option in the Preferences menu. 
Adobe was also painfully aware that the often let you do the same thing with different menus and different types of controls in these menus. They brought in an outside interface specialist to clean up the mess of inconsistencies. Nice job!
Enhanced Crop Tool
This change can take some getting used to in the way it works. You now have more control over aspect ratios, quick access to canvas changes and more. This tool was lacking and is now much better. In fact it is non-destructable meaning you can get back to your pre-crop image easily.
Speed Improvement
You will see a noticeable speed improvement in CS6. Adobe spent a lot of time working on hardware acceleration and now changes and effect happen in real time and are almost immediate. Their improved graphic “engine” called Mercury is blazing fast.
Automatic Image Correction
In earlier versions you could let Photoshop do auto image adjustments for you when in Curves, Levels and other image menus. These adjustments were never great and all of us knew that it took our own personal touch to improve an image. Rumor has it that Adobe brought in hundreds of artists to correct thousands of images manually and they documented the changes and built a database to apply the same real world logic to images. The Auto image correct feature is now much better. 
Auto Save of Files
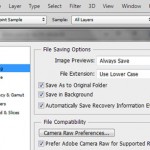
This one is nice. I can’t tell you how many times I had a crash or made a mouse click and save that I did not want and desperately wished I could go back in time. In CS6 you can tell Photoshop to do an Auto Save every 10, 15, 30 or 60 minutes. Nice!
Skin Tone Detection
This is one I am excited about. When doing color separations there is nothing harder than finding all the flesh tones because the various shades of one tone – highlight, shadow, midtone, etc. This is very cool. In the past to actually select flesh tones you would use Color Range to sample a color from the image. Even though you could add to your Selection it became hard if there were lots of shades of flesh.
When in Color Range you can now select Skin Tones as an option and a Detect Faces check box to make it more precise. It does a much better job of finding all the flesh tones and shades. If you do color separations in Photoshop you will use this feature.
Other Improvements and Changes
Other improvements have been made to the Blur Tool, Content Aware Patch, improved Cursors, new and improved Filters, additional Color Range changes, lots of new goodies for photographers, Type control changes, and more.
Important Fixes
I always found CS4 and CS5 to have weird bugs. My cursor would select areas I did not want, some tools had a mind of their own and more. The one “bug” that really annoyed me was the fact that when doing channel color separations, if you did not have Gamut Warning (under the View menu) checked, your separations would not display with Dot Gain applied that you set in the Color Settings menu. Bummer! They fixed this in CS6. You get an accurate display of the final channel seps with or without Gamut Warning checked.
Bad News For Older Mac Users
This one really hits home to me. I am basically a PC user. OK, you like what you came to the party with. But, I have an older Mac Mini that I use for development and testing. I was surprised to learn that Adobe had made CS6 64-bit only on Mac yet retained 32- and 64-bit compatibility for Windows. My Mac Mini won’t run CS6.
The funny thing is if you read all the Mac literature it is very hard to find out where Apple started making their computers 64-bit. I did a web search and was not alone. A lot of people ask “how do I know if my Mac is 64-bit?” I finally found an Apple support page that gave a chart. Click here to see it. I had to buy a newer Mac so I can run CS6 on it. Before you decide to upgrade you need to know if you can run a 64-bit program on your Mac.
Summary
OK, I like CS6 and CC versions. I now use CC 2017 everyday. But, since I do color separations all day long and most of my customers have a RIP for film output, I end up either doing the seps in CS4 and setting the Screen button for the lpi and angle, or I do the seps in CS6 or CC and then re-open the file in CS4 before I save it for my customers. What a hassle.
But, with the speed improvements, the much improved Color Range menu with Skin Tone detection and other neat features, I can highly recommend CS6/CC.


