By Scott Fresener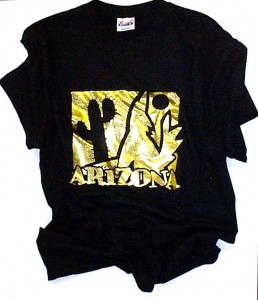
In the early to mid 90’s, foil on shirts was HUGE! We use to teach it in our classes and the students really ate it up. About 1996, we stopped showing it because no on cared. Guess what? Like so many other things in this industry, foil made a giant comeback in the last few years. We dusted off the foil and started having students use it again. Like puff ink…. we thought it would go away. Well, it didn’t. You now see foil everywhere – especially on the all-over prints. Guy use to never wear a shirt with foil. Now it is like  bling. Everyone wears it.
This article will detail how to incorporate foil with direct screen prints, heat transfers and how to get a raised and antique look by using foil with puff ink (yes, it’s back too!).
The first thing you will notice is that ITS EASY. The second thing you will notice is that ITS SLOW.
In a recent trip to the large MAGIC Show (Men’s Apparel Guild) where EVERYONE was showing bling and foil, I had a chance to hear that “real men wear foil” from one of my show interviews. Check it out here:
The Basic Principles
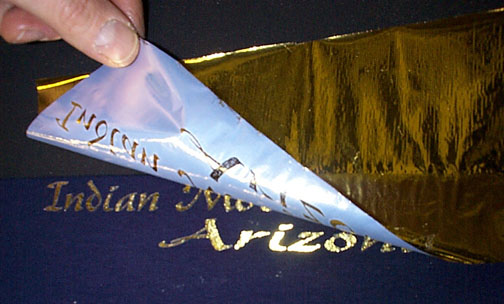
The foil used for screen printing is similar to that used for hot stamping. It is generally a 4 mil thickness and is sold by most industry 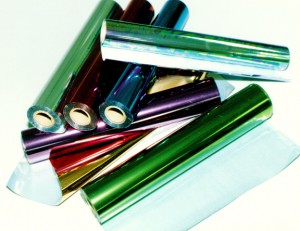 ink companies and screen printing supply companies. Just type in Hot Stamping foil as a web search and see what you will find. It varies in price from $20 per roll to over $50 per roll and you can get all sizes. It is sold by the roll and is available in a wide variety of colors. The principle is simple. The foil has a top clear carrier sheet that has the shiney foil image applied to the underside of this sheet. The foil portion of the sheet will stick to most “adhesives.” In this industry, plastisol is the adhesive used to pull the foil off the carrier sheet and hold it in place on the garment. The key to prints that combine foil with other colorful elements in a design is FOIL DOES NOT STICK TO WATERBASED INK. Other than that – all you need is a heat press and you are in business!
Foil on Direct Screen Printing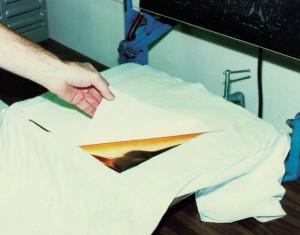
Foil can easily be applied to direct screen printing. Just make sure to use a low mesh count so there is plenty of ink for the foil to adhere to. Keep the mesh to 125/45 (inches/centimeters) or lower. Make sure the print is very smooth.
Keep in mind that if the print is multi-color, the foil will “stick” to the entire print.
Here are the steps:
1. Make a smooth solid print (keep away from halftones and gradations).
2. Cure the print as normal.
3. Place the printed garment on a heat transfer press set to 375 degrees F with heavy pressure.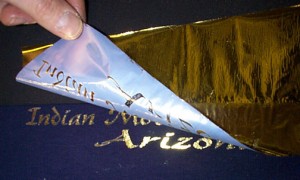
4. Cut a piece of foil larger than the image.
5. Place the foil with the colored side UP over the direct print.
6. Place a piece of cloth or test material over the foil to help keep it from curling when heat is applied to it.
7. Lower the press and “cook” the print for 10 seconds.
8. Raise the press carefully so as to not disturb the foil. Cool the print for about 15 seconds with a rag shirt.
9. Peel the foil.

Option: If you want to have the foil only stick to portions of the image, use a textile water-based ink or discharge ink for the “non-foil” areas. Foil does not stick to water-based ink. Print the area to be foiled with plastisol.
Foil on a Heat Transfer
The steps are similar to applying to a direct print, except you will get a much smoother “mirror look” to the print.
Here are the steps:
1. Make a standard plastisol heat transfer that can be “cold peeled” (let the paper cool). For more information about making heat transfers see other technical articles in this section.
2. Apply the transfer and cold peel it so the surface is smooth and rubbery.
3. Place a piece of foil with the colored side up on the transfer and lay a sheet of test material over it. Cook for 5 seconds.
4. Carefully raise the press and cool the print.
5. Peel the foil. Oh……… ah………. neat!
Foil and a Puff Print
Remember, foil sticks to plastisol. Puff ink is plastisol. There are a number of ways to do this.
Foil as an Accent to a Multi-Color Puff Print
This is a VERY nice effect!
1. Create a special puff “plate” that will be printed FIRST and flash cured to just skin cure the pruff print. The image should be design details and areas of the print that you want to be raised. Print the puff through an 86/34 (inches/centimeters) mesh.
2. Print a standard mullti-colored print on top of the puff,
3. Cure this print. The details and highlights of the print will be puffed.
4. Place this print on a heat transfer press.
5. Lay a sheet of foil on top with the colored side up. Place a protective sheet of test material on top.
6. Lower the press with LIGHT PRESSURE and cook the image for 15 seconds. With light pressure you don’t smash the puff ink and the foil just sticks to the top of the puff and makes the highlight and all raised areas foiled. You MUST play with the pressure and times. With more pressure you lay down more foil but you run the risk of foiling the entire multi-color image.
7. Raise the press carefully, cool the print and peel the foil. More ohs and ahs.
An option is to print the puff ink LAST in the sequence (after you flash cure the undercolors). This gives you a very high puff print on top of other colors and the foil adheres to more of the puff and less of the regular plastisol. Your outlines and detail areas will be more pronounced with this method.
Foil and One-Color Puff Print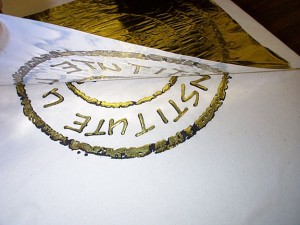
This technique is the same as for the “Multi-color/Puff print” with the exception that you can use more pressure.
With this technique, if you apply light pressure, you get an antique look to the print. By clamping down the heat press, you smash the puff but you get total foil on the image and still get a little raised effect. Again……. very cool!
A Fun Technique
If you want some real fun, crinkle the piece of foil up into a ball. Uncrinkle it and then foil the shirt. You get a great antique look!
Don’t Waste Foil
After the application, the foil sheet still has lots of good foil left on it. You can save pieces and use them over and over. If you are doing freeform shirts you can simply keep using them until there is not more foil to come off.
Washing Instructions
The only downside is that the foil with tarnish slightly after the first washing. I think if you lower the customer’s expectations and let them know that it will hold up “pretty well” to washing, they will accept that. To help improve the durability, try to provide washing instructions. Yes, no one reads these things but hey, you have done your part.
They should wash the garment inside out and use warm water or gentle setting and a dryer setting of warm. Although hanging a shirt dry is preferable I don’t think you can convince anyone to this.
That’s It!
That’s really all there is too it. It isn’t too complicated and can make a design really stand out. Now is the time to buy a roll of foil, work us a design (maybe use your logo) and have fun with a puff and foil combo print. Your customers will love the look and they will think you work magic with this wonderful screen printing process!


